Getting Started with Frame's Excel Integration
Learn how to connect your BIM model to Excel using Frame's integration.

Frame Team

Microsoft Excel remains the cornerstone for data analysis, cost planning, and field reporting in the Architecture, Engineering, and Construction (AECO) industry. However, it has traditionally operated separately from Building Information Modeling (BIM), forcing teams to work with static data exports and losing the vital connection to 3D models.
Frame’s Excel integration closes this gap—bringing live, interactive BIM models directly into the familiar Excel environment. This seamless workflow connects project data with real-world context, empowering your team to make smarter, data-driven decisions.
Key Features
-
Native Excel Experience: View and filter interactive 3D models directly within Excel—no extra software training required.
-
Bi-Directional Interaction: Filter your spreadsheet to update the model in real time, or select elements in the model to instantly filter your Excel data.
-
Full Excel Functionality: Use tools like conditional formatting to color-code model elements or create pivot tables from live BIM data.
Step-by-Step Guide: Connecting BIM to Excel
Part 1: Prepare Your Models in Frame
Configure Autodesk Credentials
Link your Frame account with Autodesk Platform Services (APS) to enable model translation tasks. This one-time configuration grants Frame the authorization to process your models.
Need help? See our guide: Setting Up Your Autodesk Integration with Frame.
Upload Your BIM Model
Upload your Revit, Navisworks, or IFC models to your Frame dashboard. Once processed, your models will be available in the Excel Add-in.
Part 2: Activate the Frame Add-in in Excel
Install the “BIM Frame” Add-in
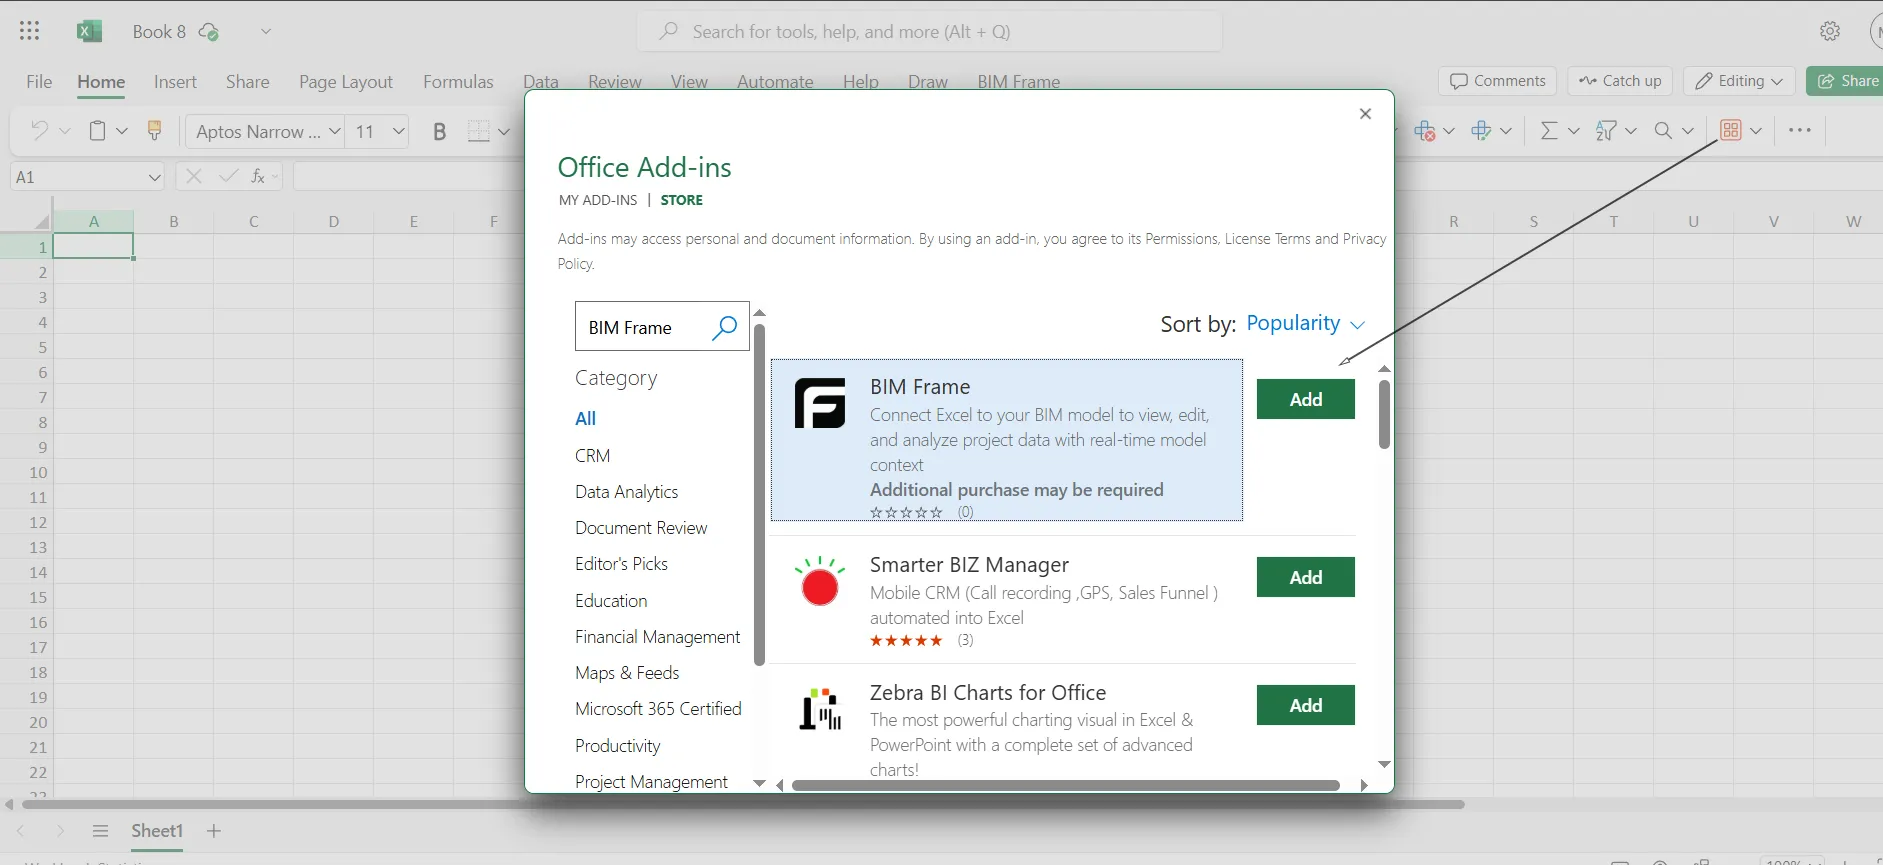
- Open Excel and go to the Insert tab
- Click Get Add-ins
- Search for “BIM Frame” and click Add
- The Frame logo will appear in your Excel ribbon
Log In to Your Frame Account
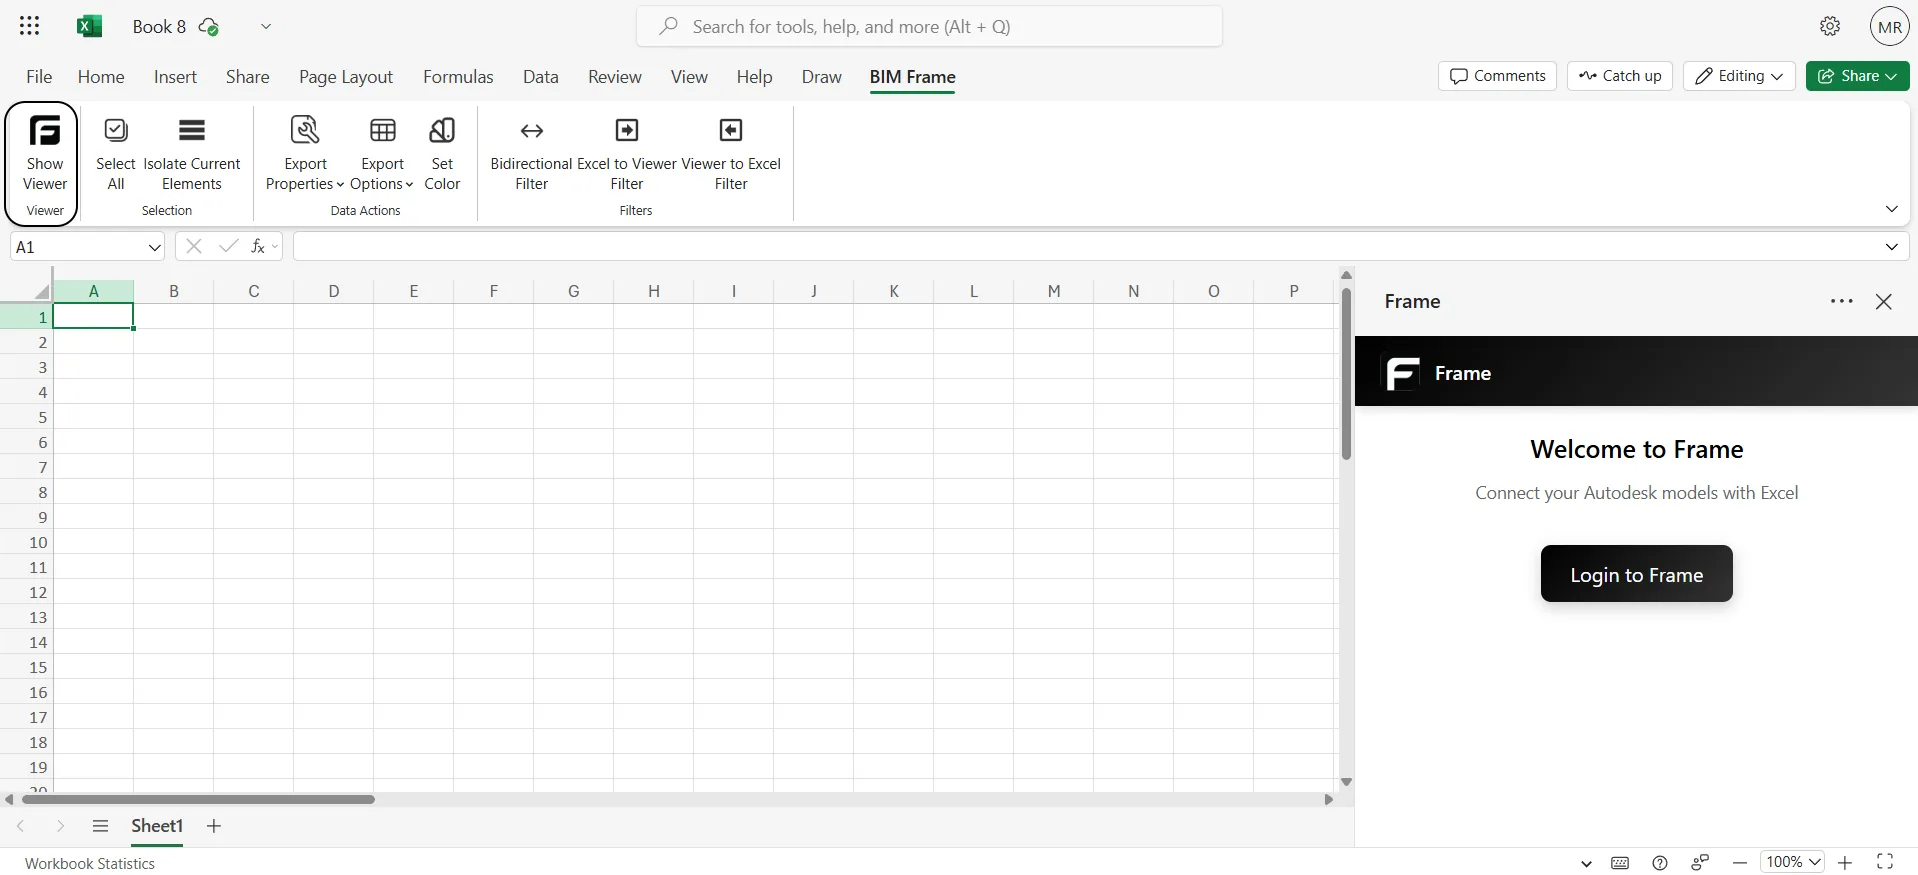
- Click the Frame icon in the ribbon to open the add-in panel
- Log in with your Frame web dashboard credentials
- Your Excel session is now securely linked to your Frame account
Part 3: Interact with Your Data
Select Your Model and Begin
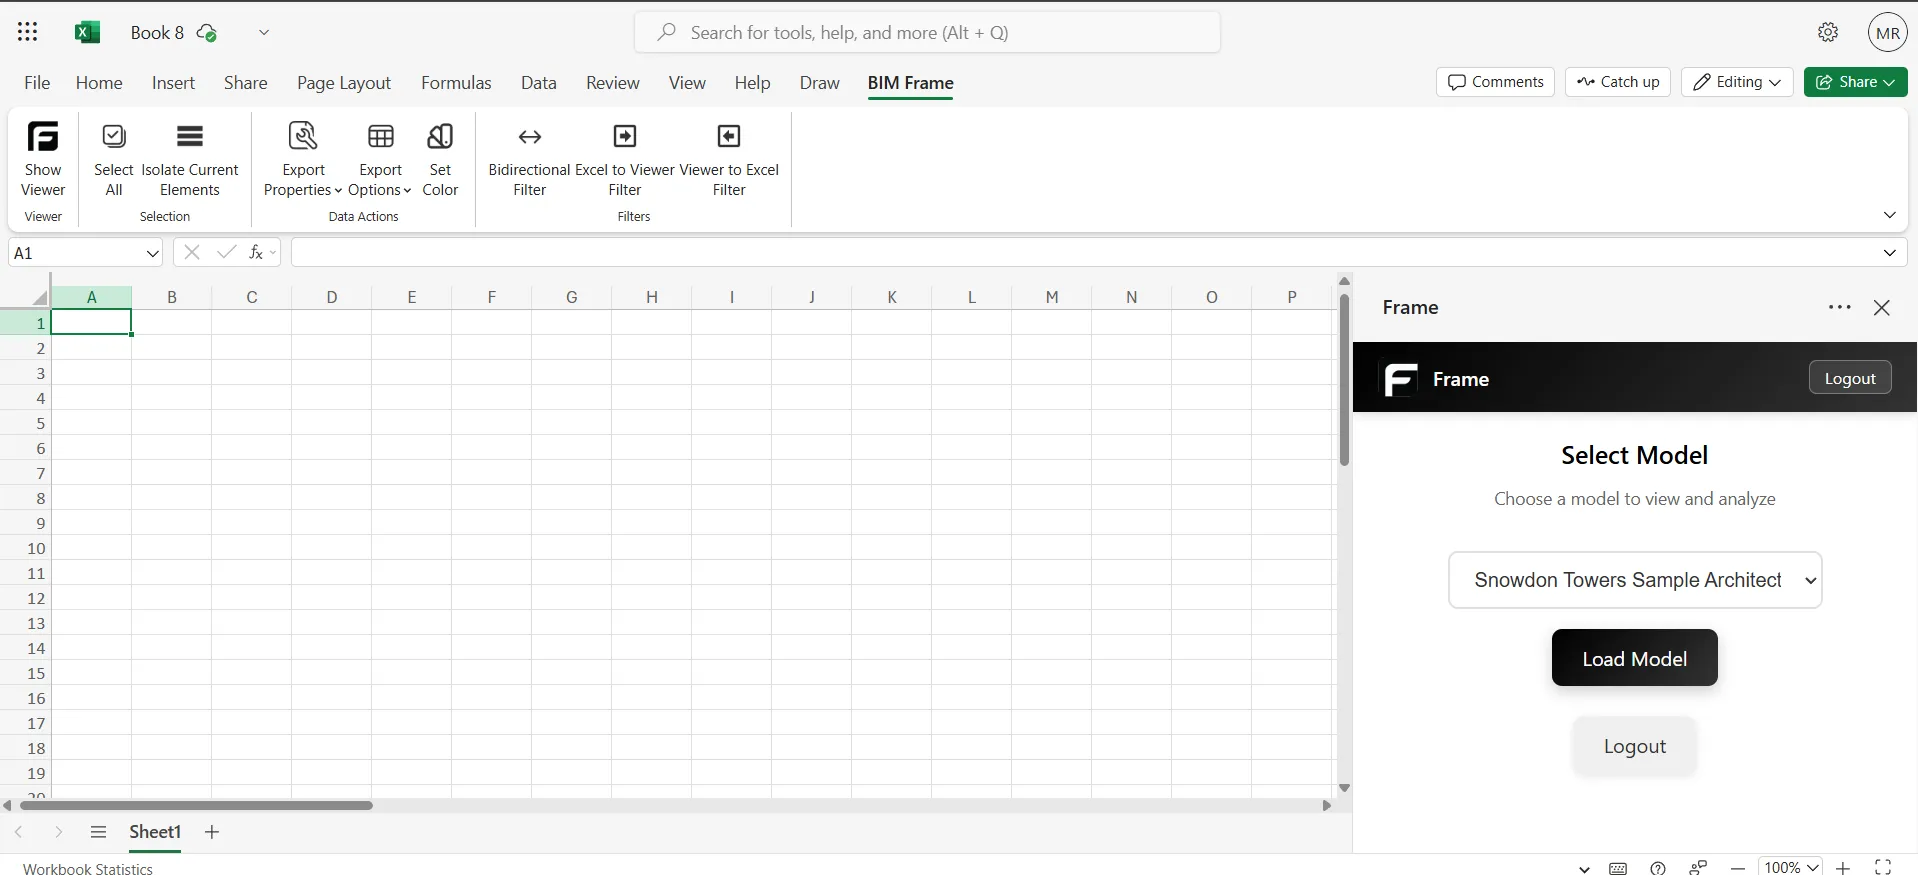
- In the add-in panel, select a model from your uploaded list
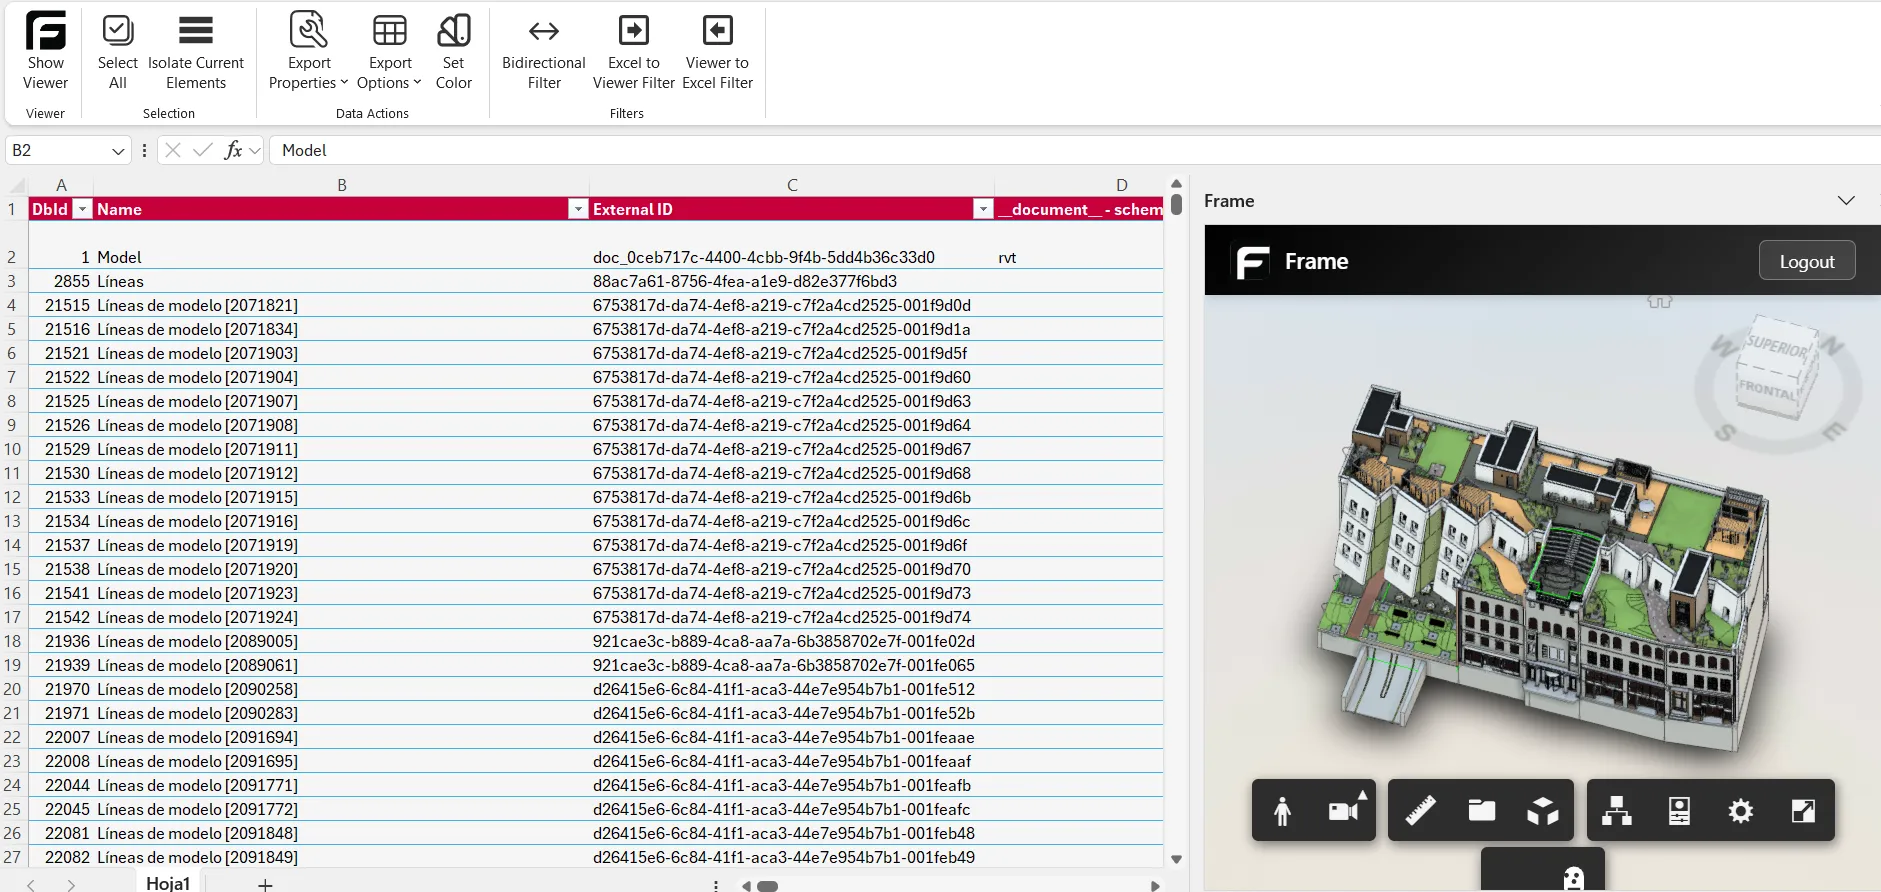
- The model’s data loads directly into your worksheet
- You can now interact with your BIM model and data—filter, analyze, and visualize—all within Excel
For a full overview of features like data exporting, bi-directional filtering, and color-coding, visit our Excel Integration Features Page.
Unlocking New Workflows
By bringing BIM into Excel, you democratize access to critical project information and empower your team to make better decisions.
Ready to connect your models to the world’s most powerful spreadsheet tool? Get started with Frame today.